How to build a vacuum chamber…
 Start with a beer…
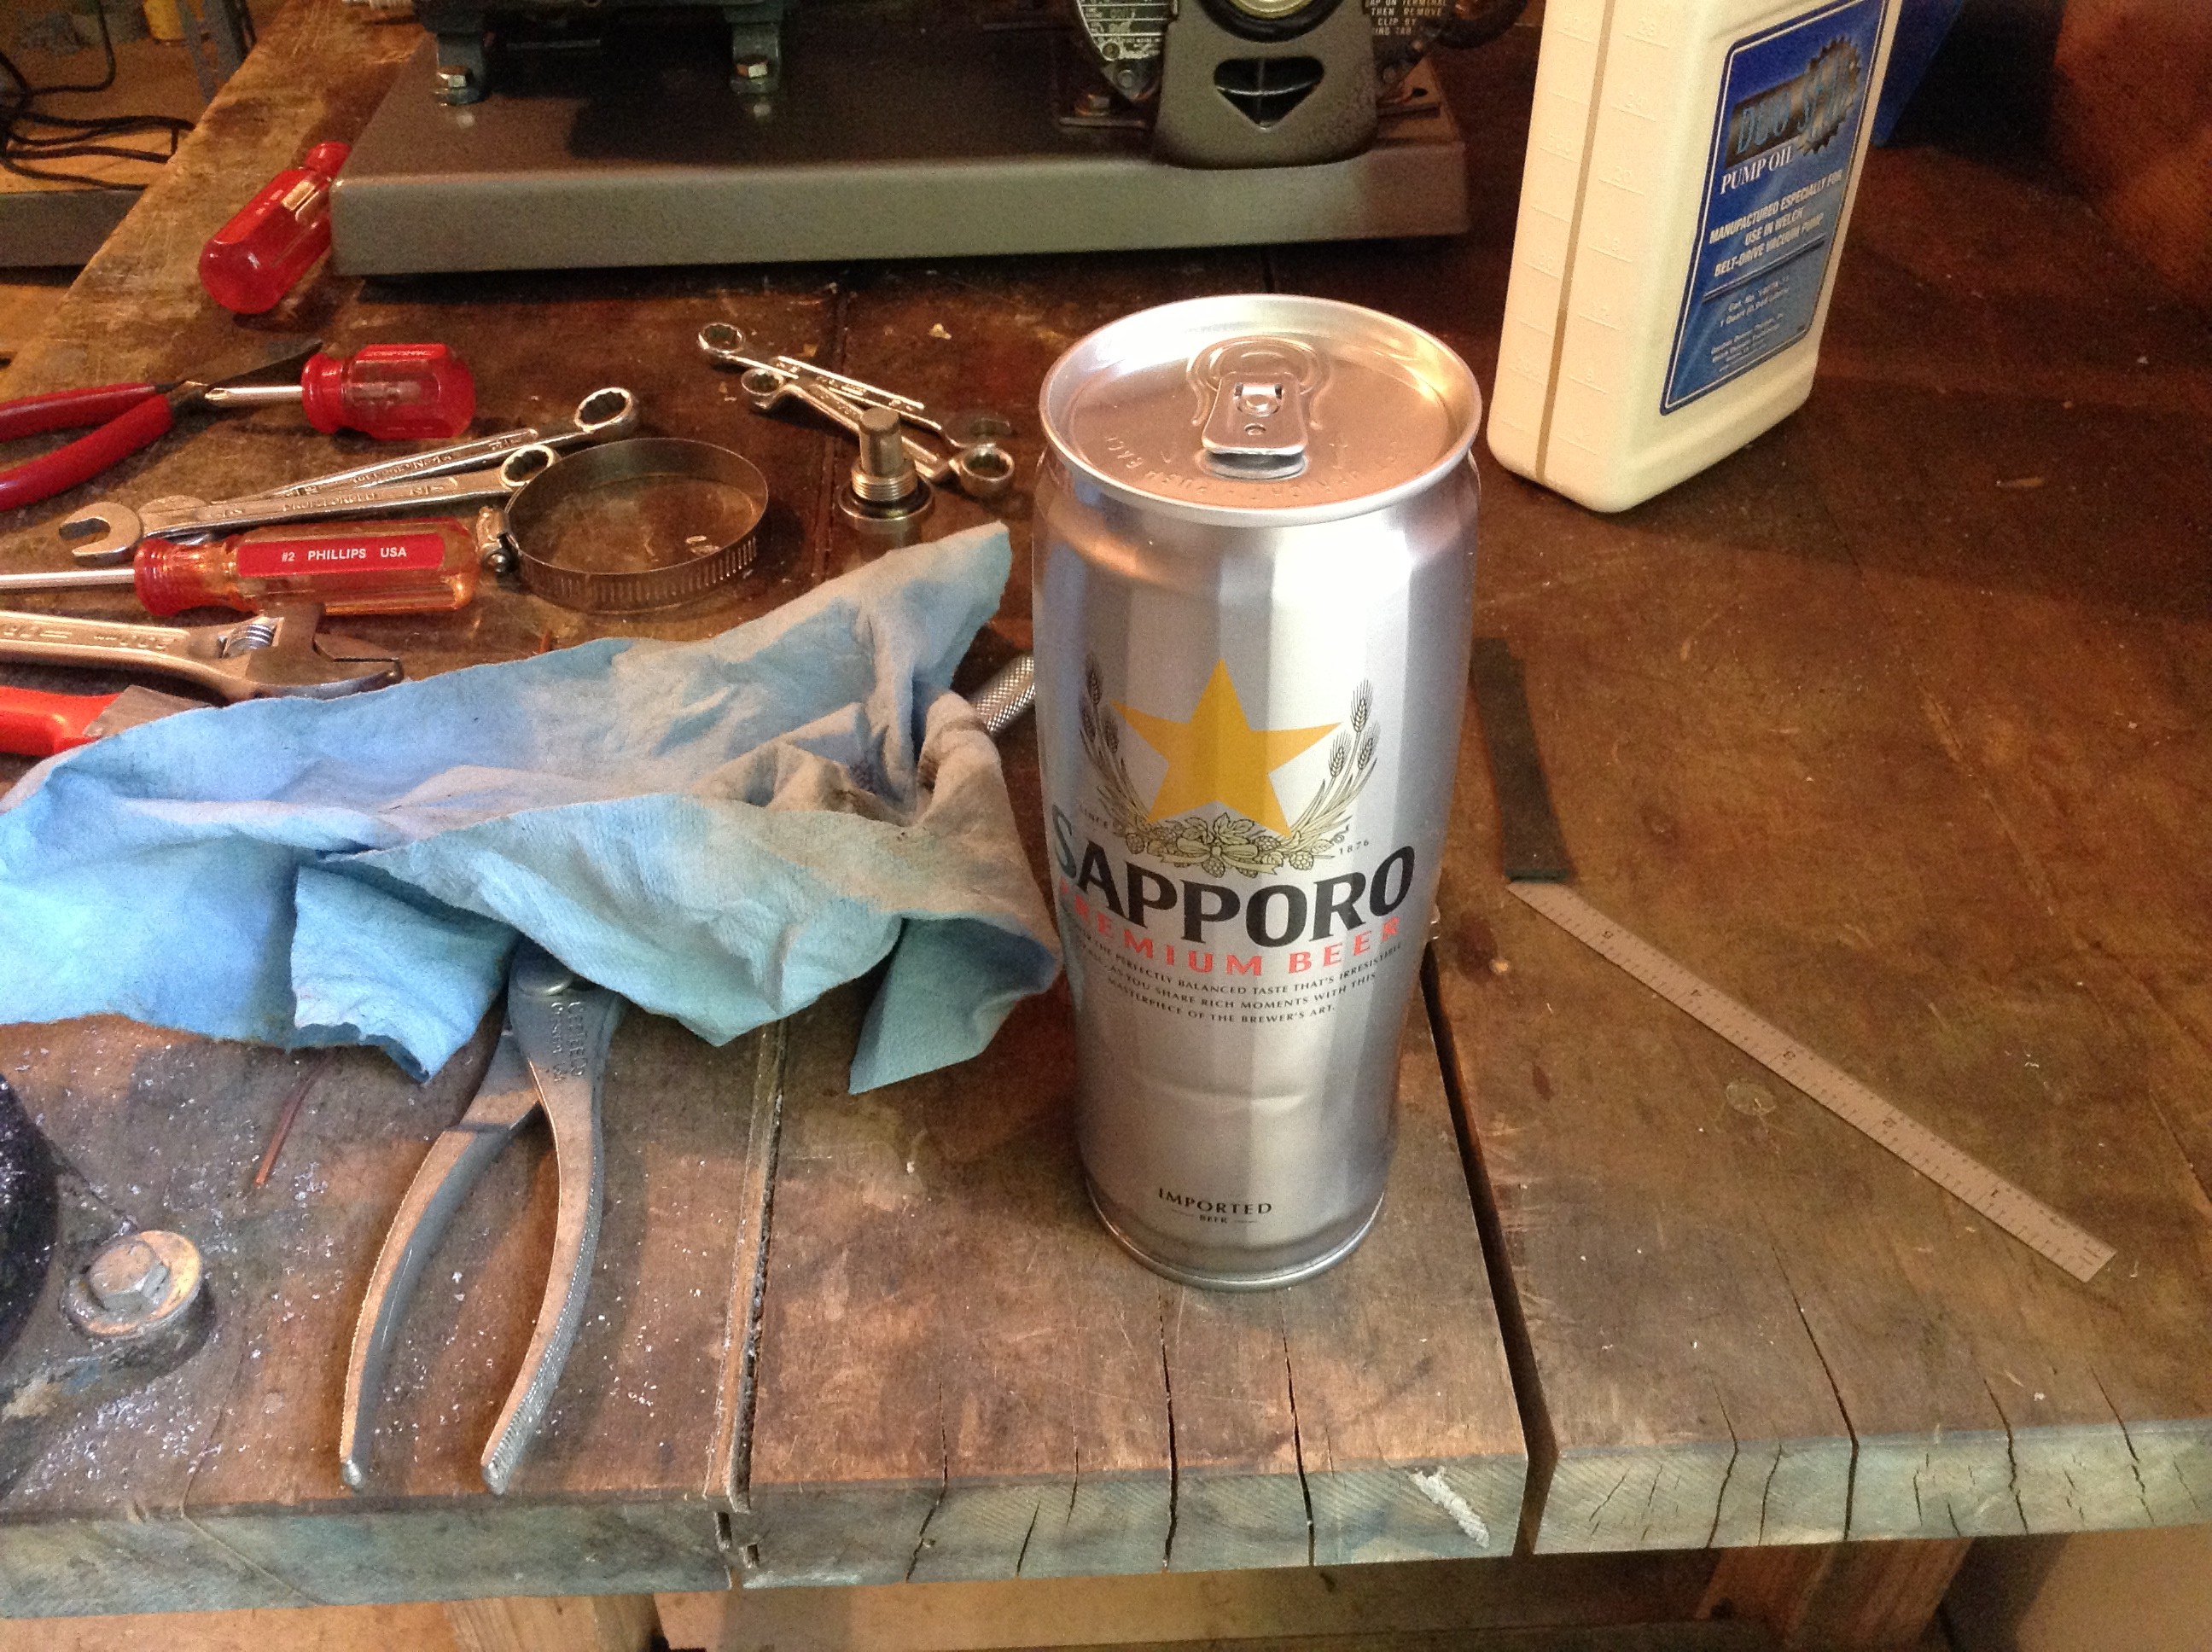
Here is a list of easy-to-find parts necessary to build a nuclear fusion reactor and where to find them:
- Beer can (liquor store)
- Oil burner igniter (online spark plug store)
- Threadsaver sized for the spark plug (hardware store)
- Small lexan or polycarbonate sheet (hardware store)
- Two 1.5″ zinc washers (hardware store)
- 6″x6″ thin neoprene sheet (hardware store)
- Four 1″ C-clamps (hardware store)
- Small portion of JB Weld or similar epoxy (hardware store)
- Thread seal tape (hardware store)
- Large gauge wire crimps (Radio Shack)
- Stainless steel wire (Radio Shack)
- KF25 weldable nipple (eBay or scientific vacuum company)
Total cost: $79.40
And actually, it’s much less than that, probably well under $50 due to the fact that the smallest amounts of these items is much more than required for the reactor. The most expensive item was the threadsaver, basically a small sleeve for the spark plug, because they only come in boxes of 8 and you only need one.
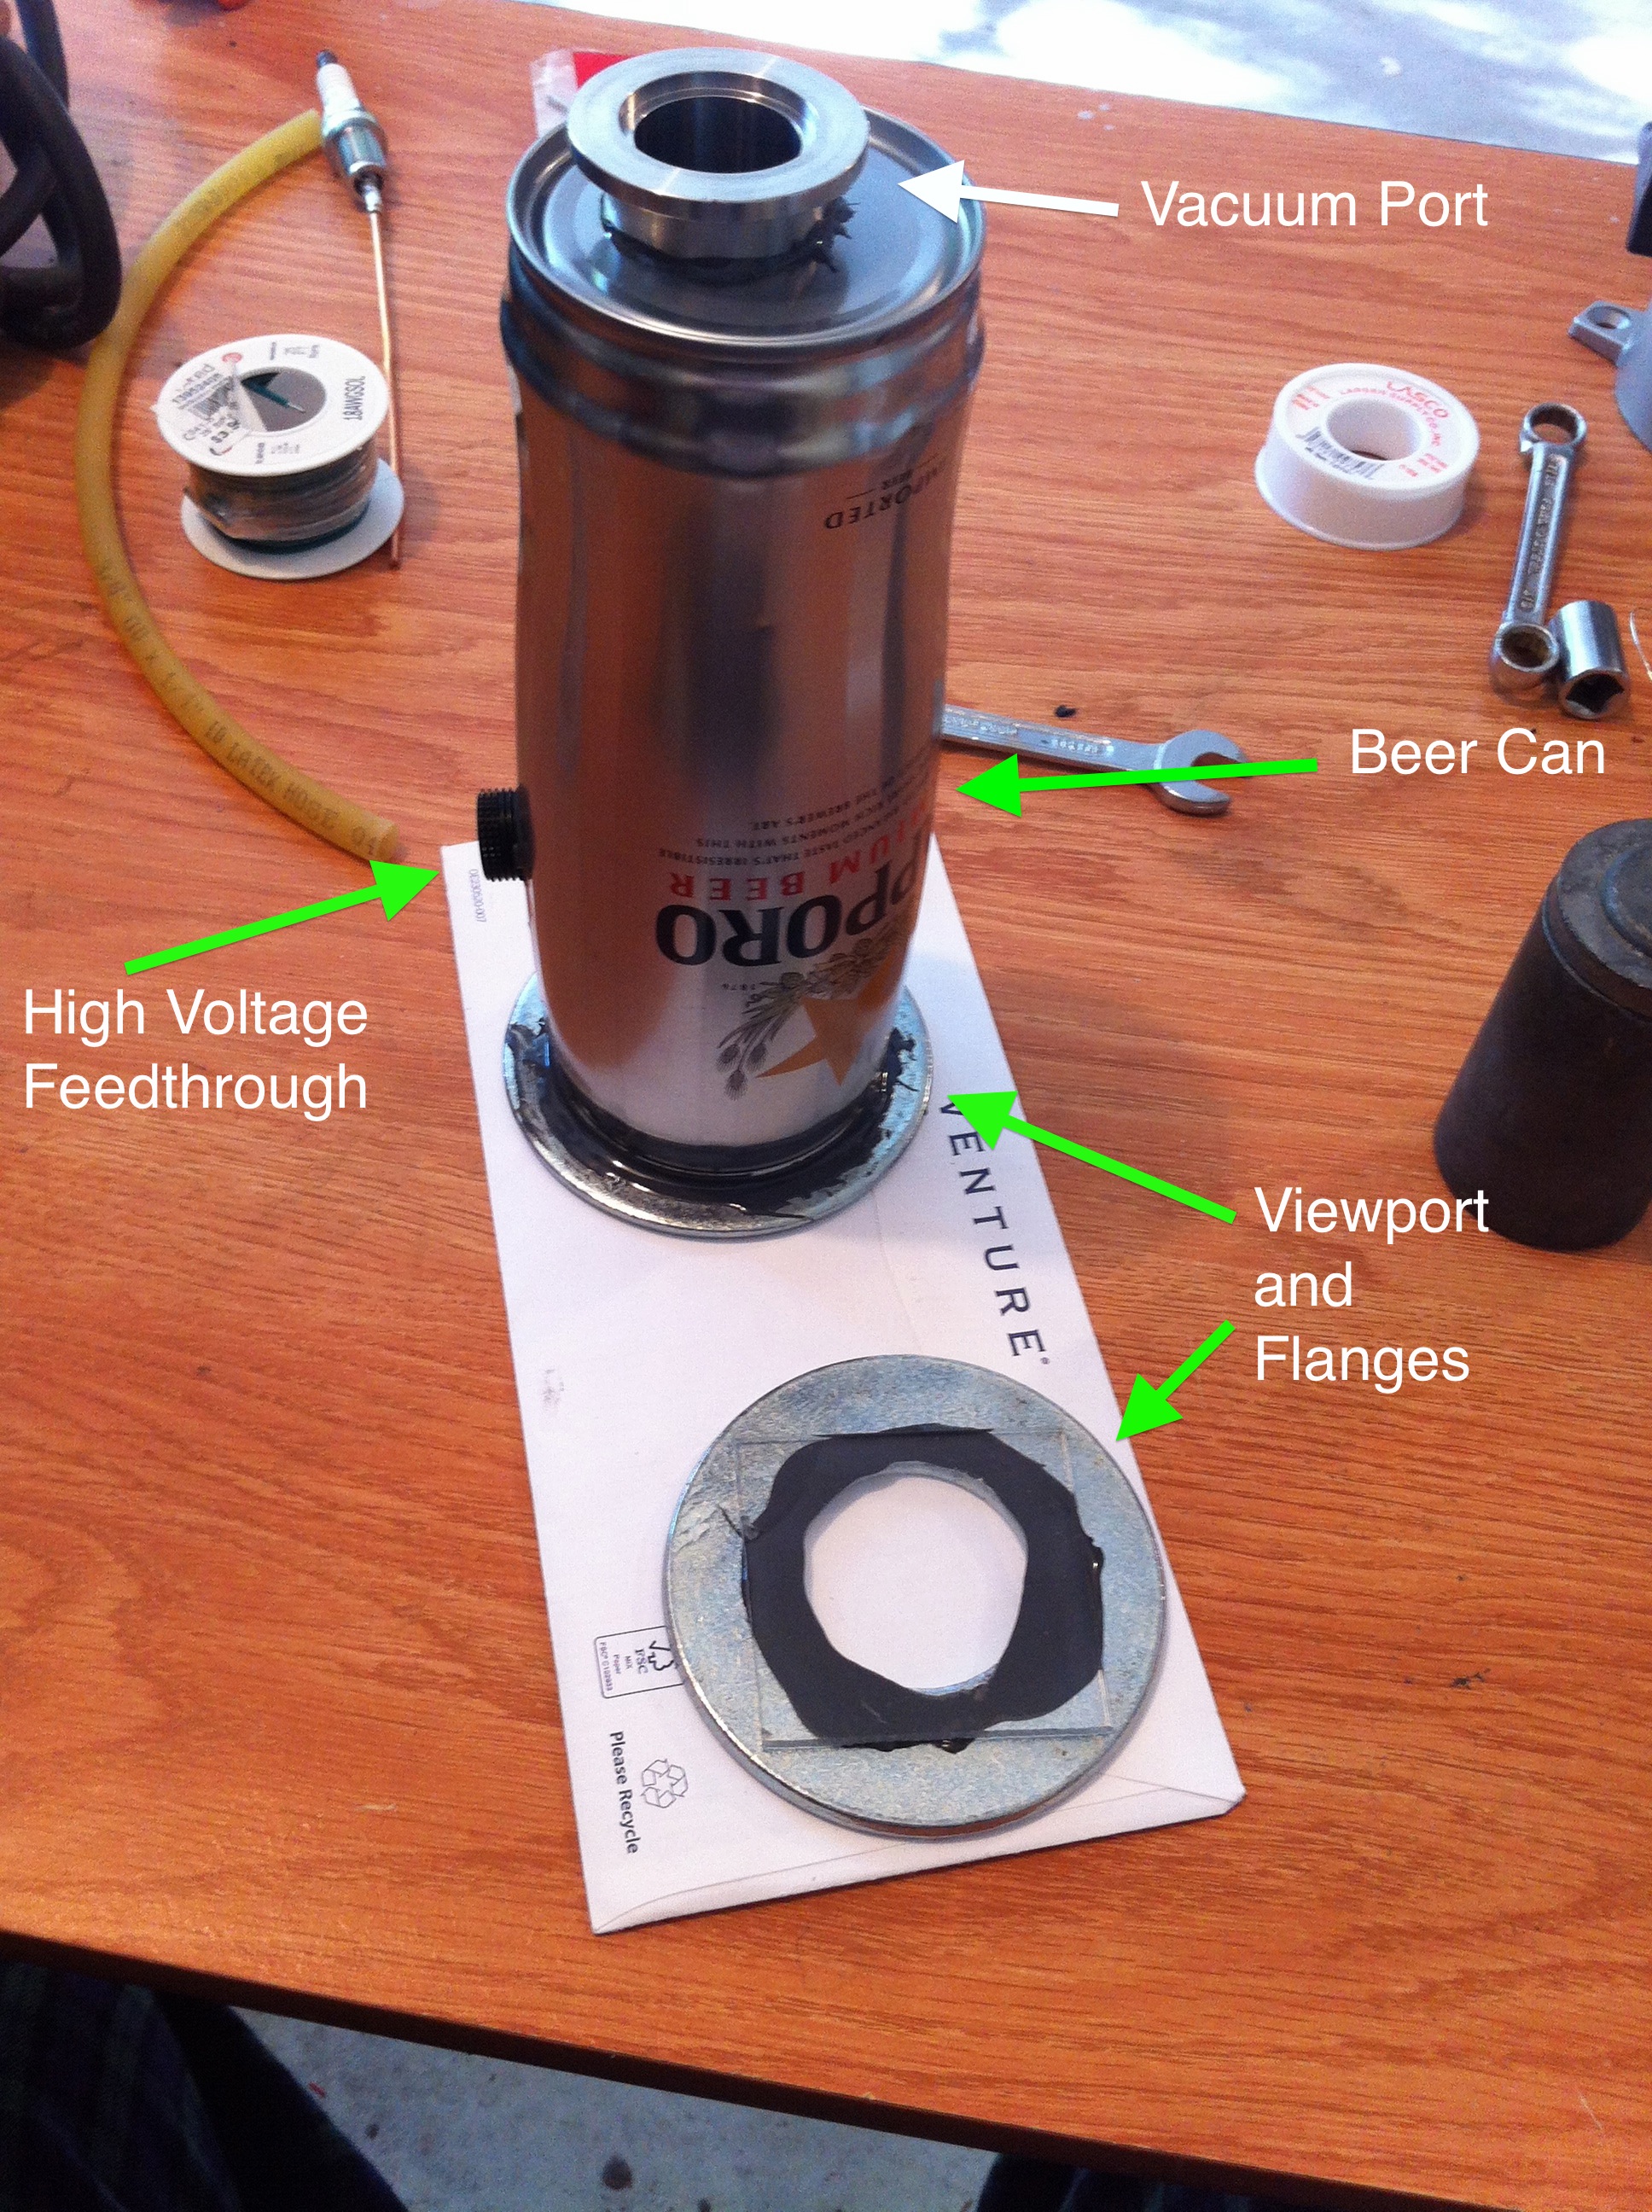
How do you build the chamber? Well, first you get the proper beer can. Aluminum won’t do. However, Sapporo beer cans are made out of corrugated steel and are surprisingly strong. You can get them almost anywhere that sells Japanese beer.
The next thing you do is empty the beer. My friend Anna asked, “do you pour the beer out in the sink?” Well yes, that is one method. Another method would be to pour the beer into your mouth and drink it.
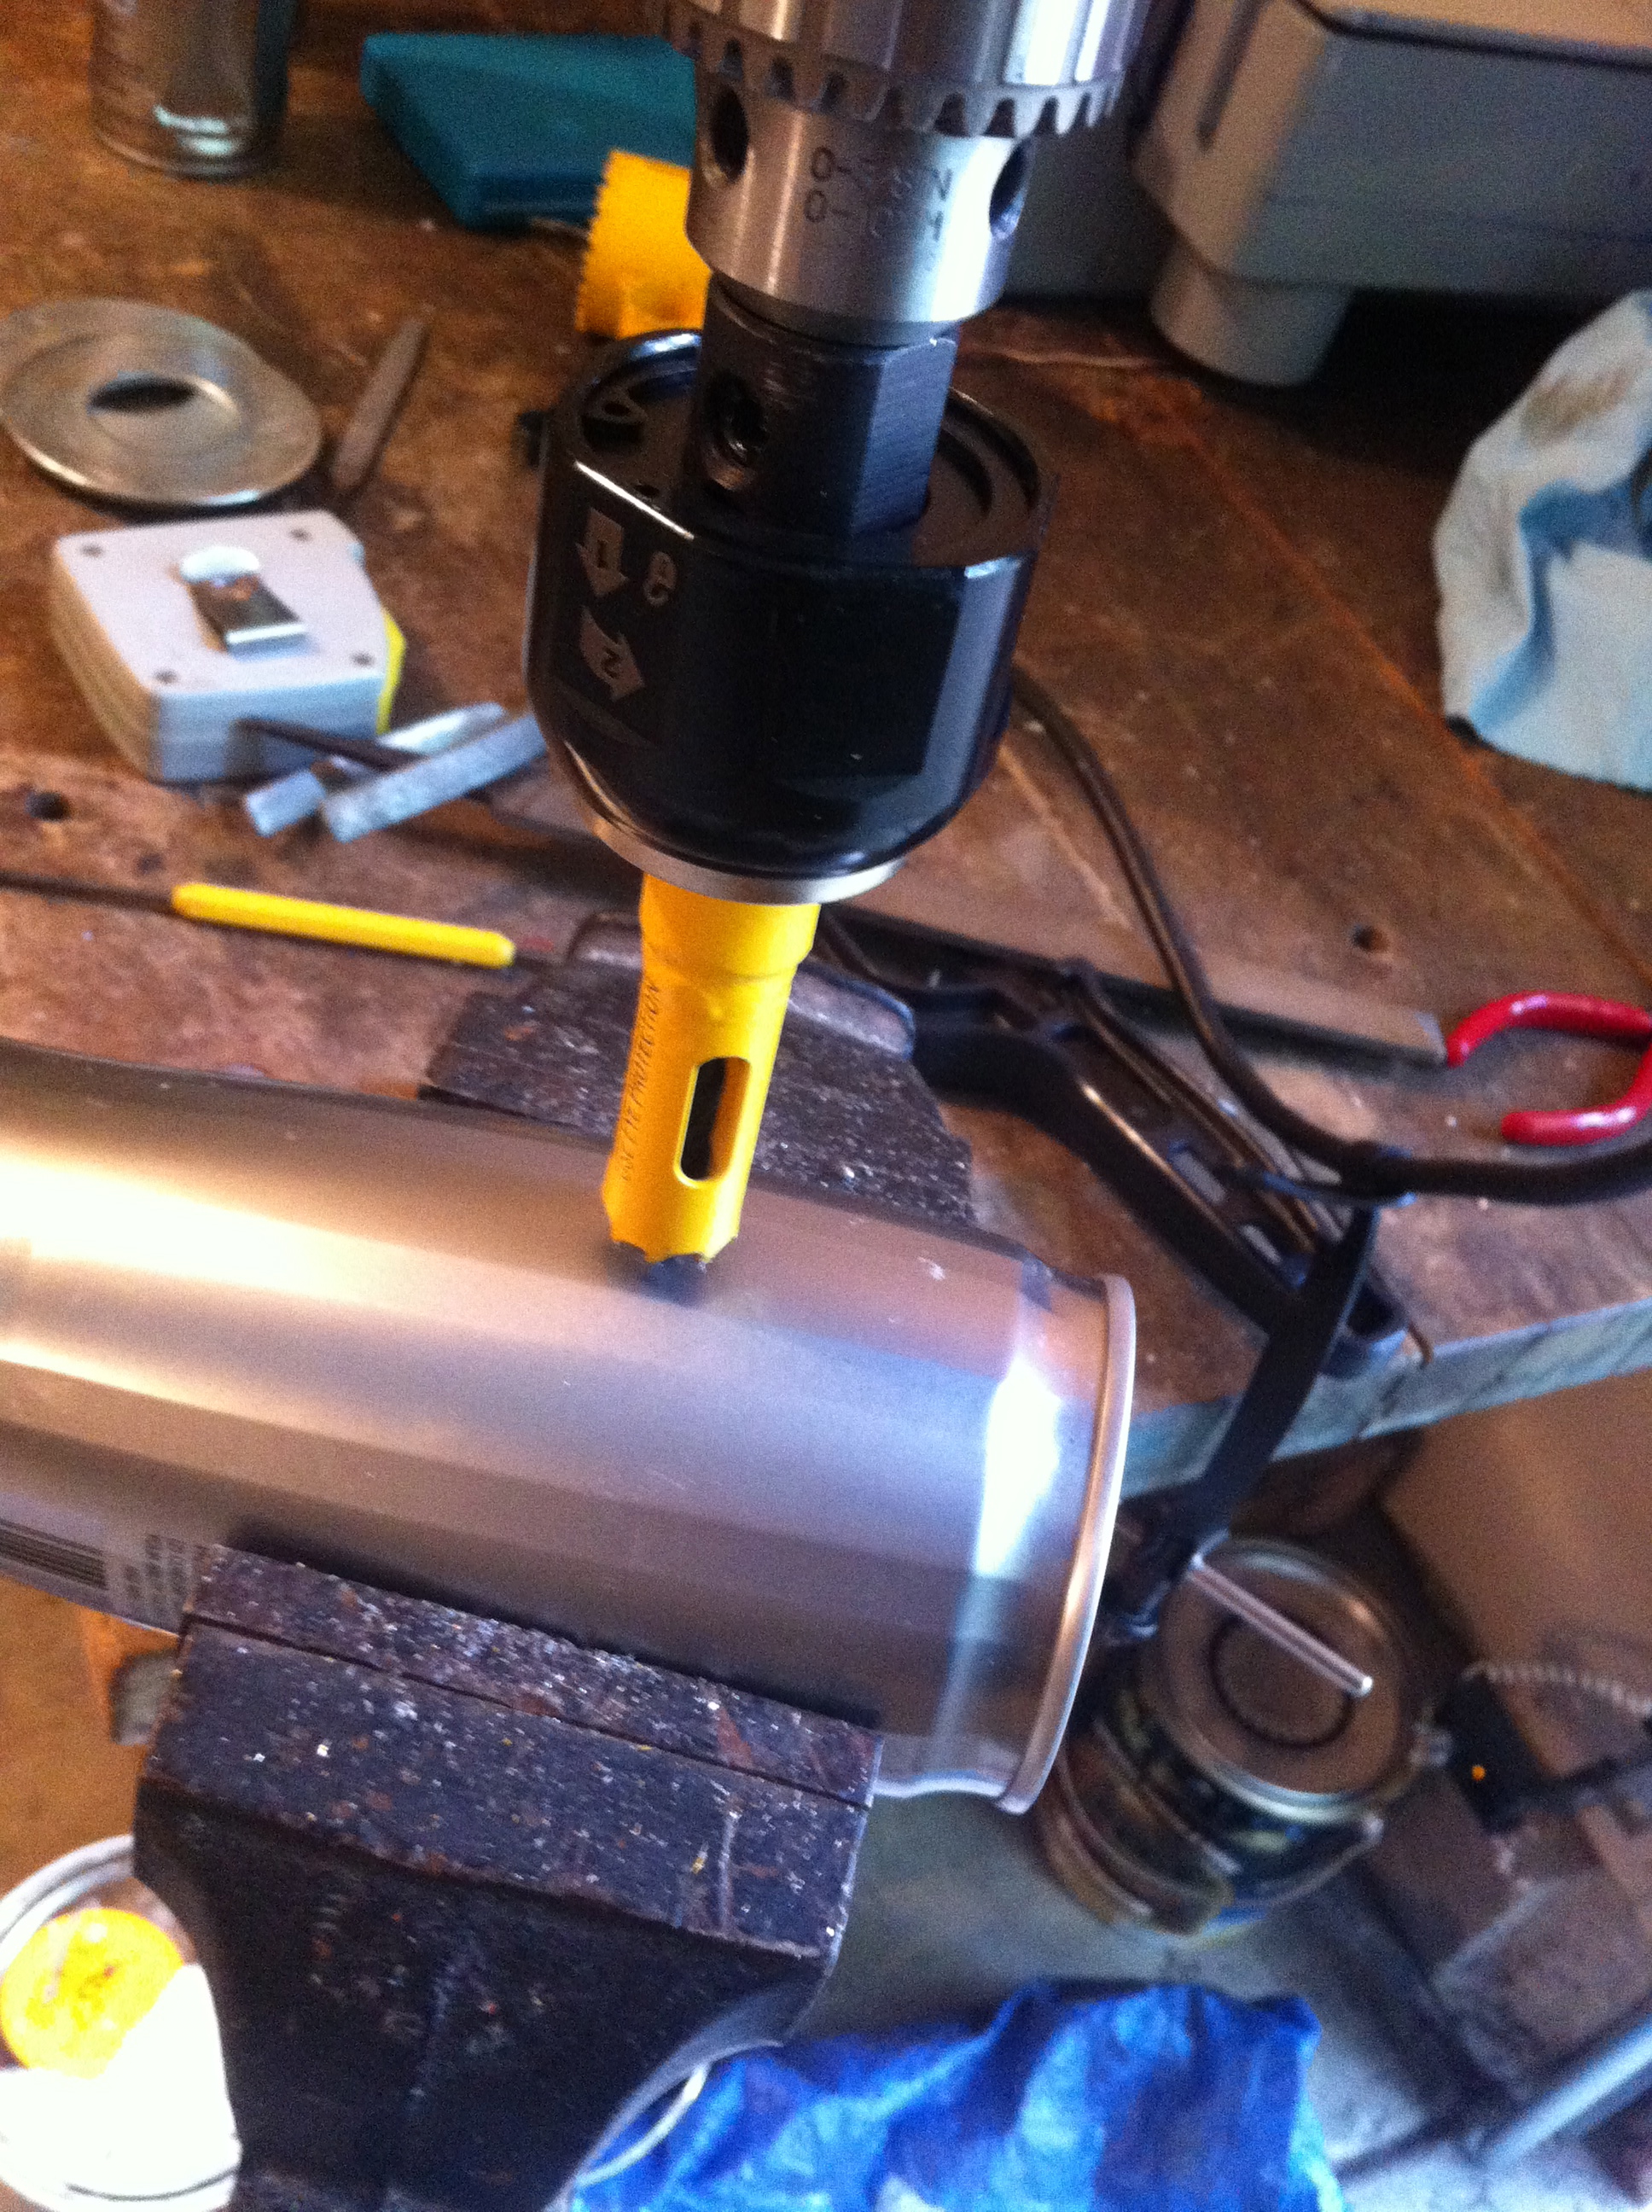
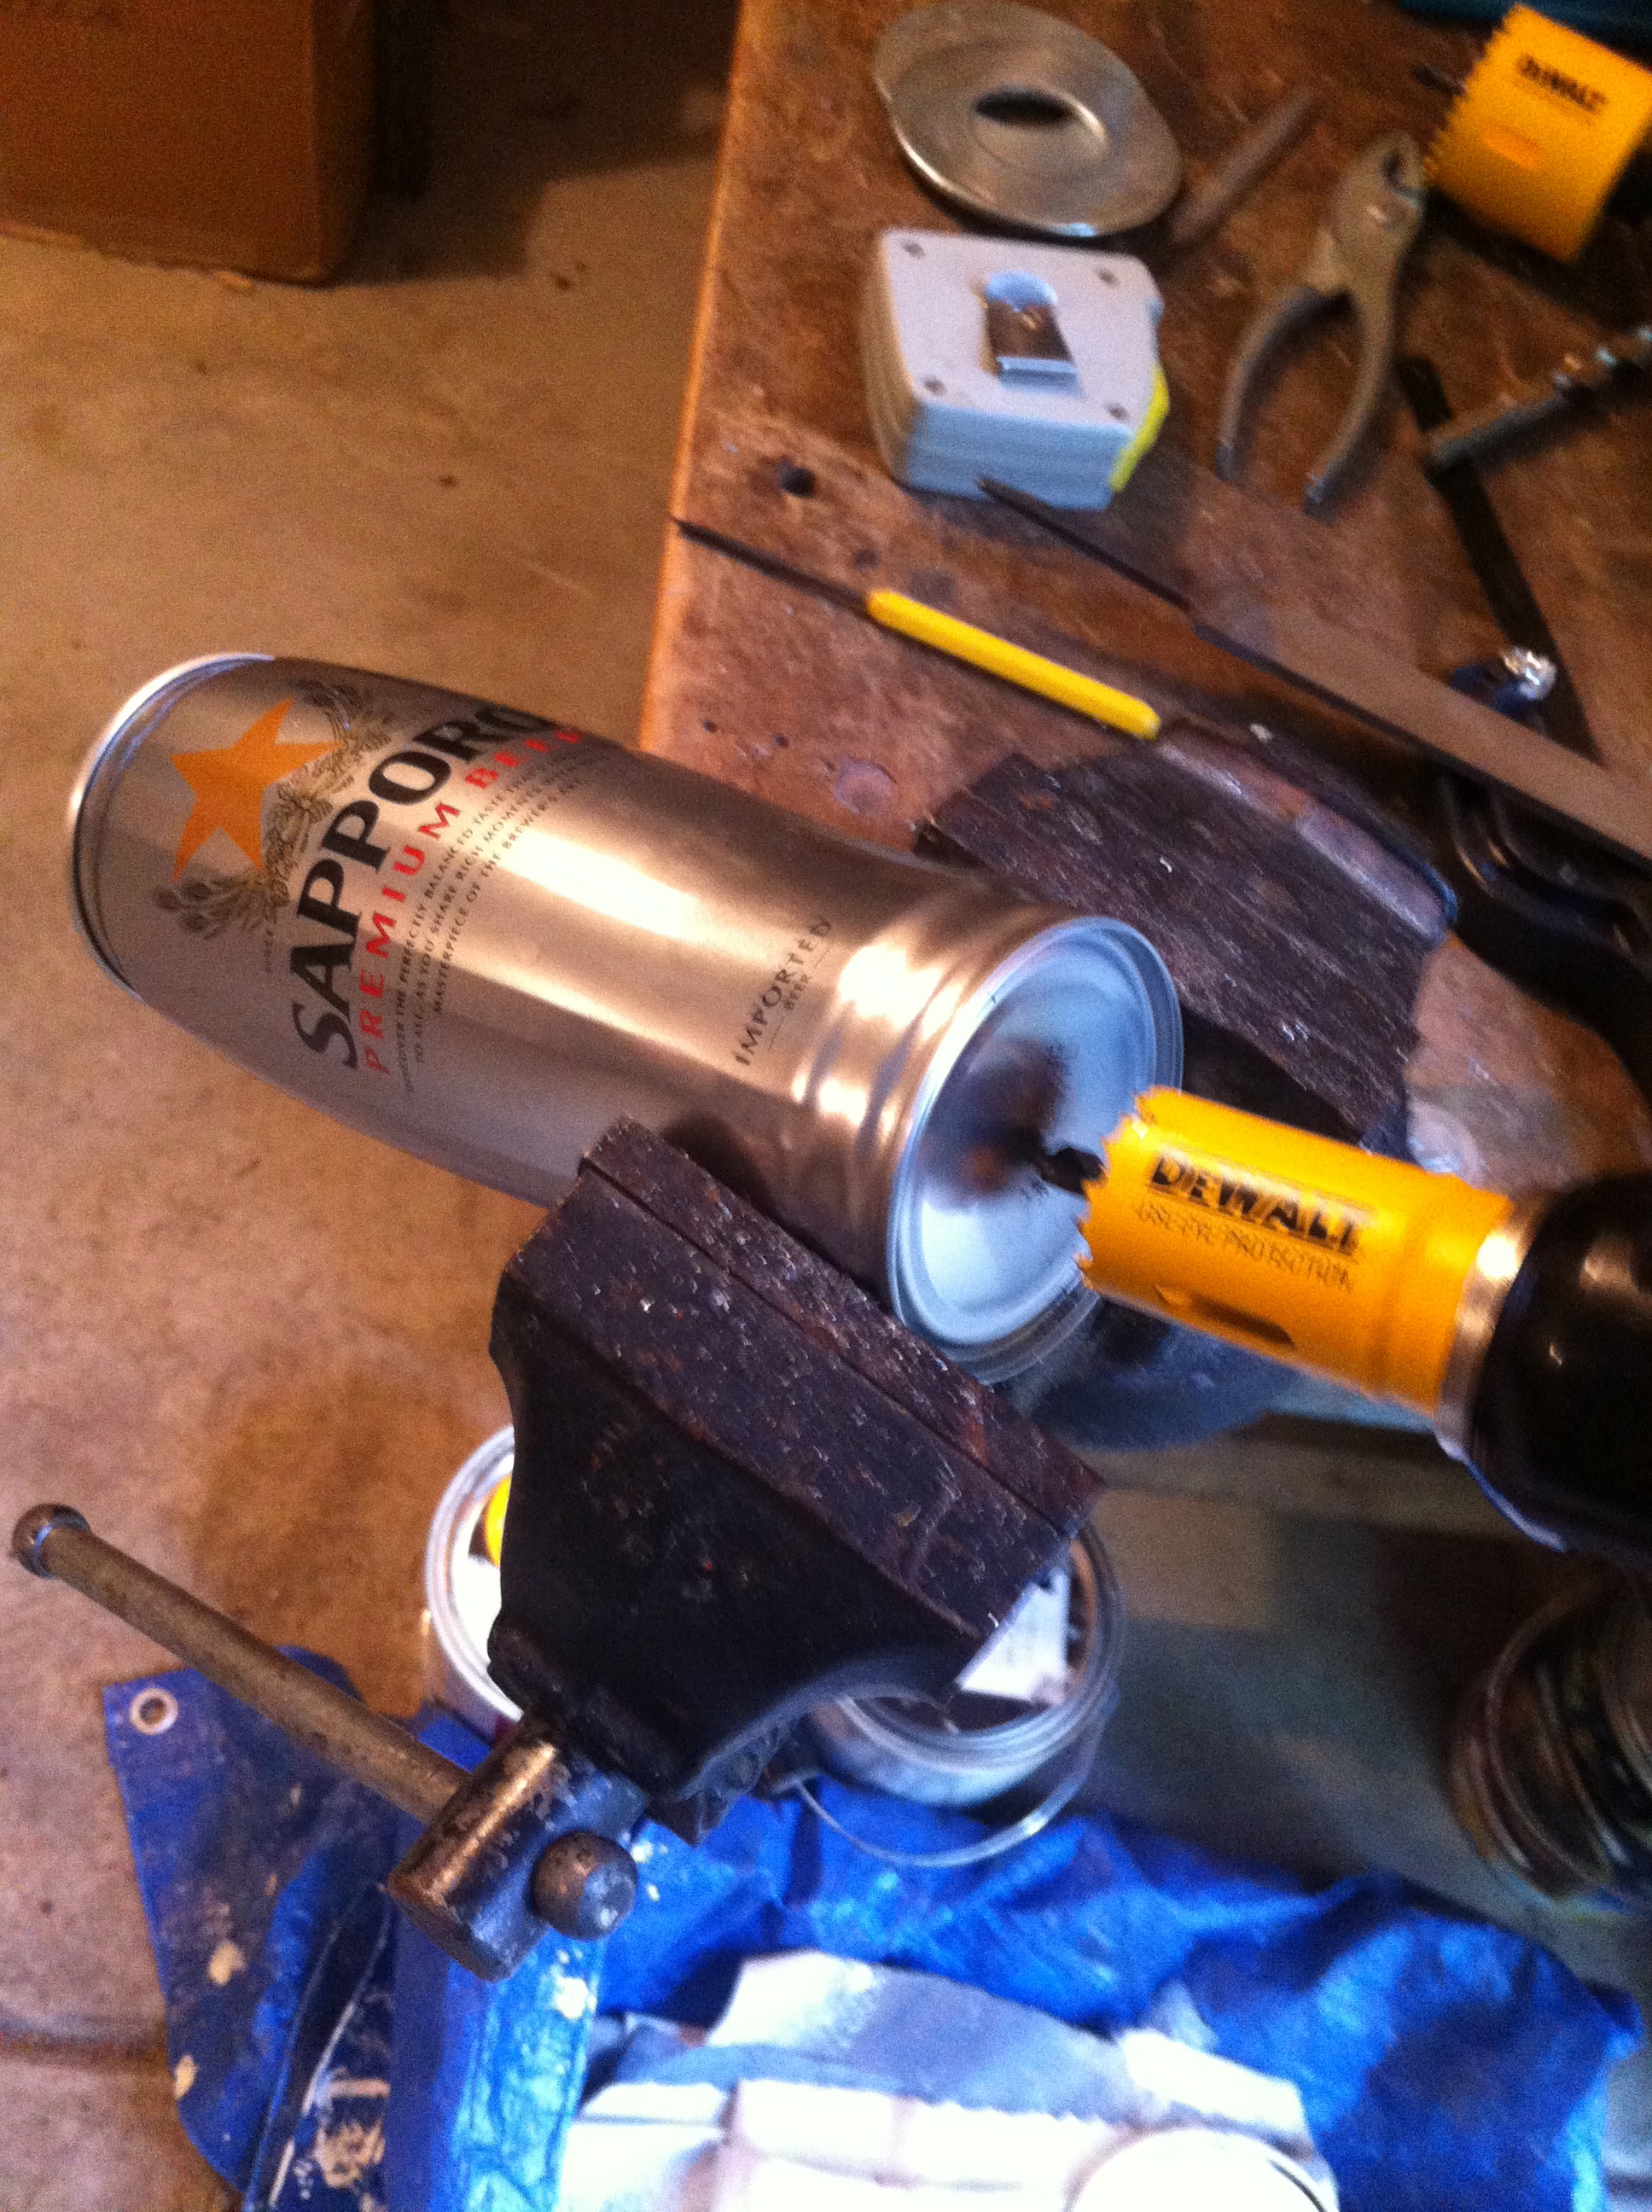
When the beer is empty, drill two holes of proper size, the spark hole (below, top) and then the vacuum feedthrough hole (below, bottom).
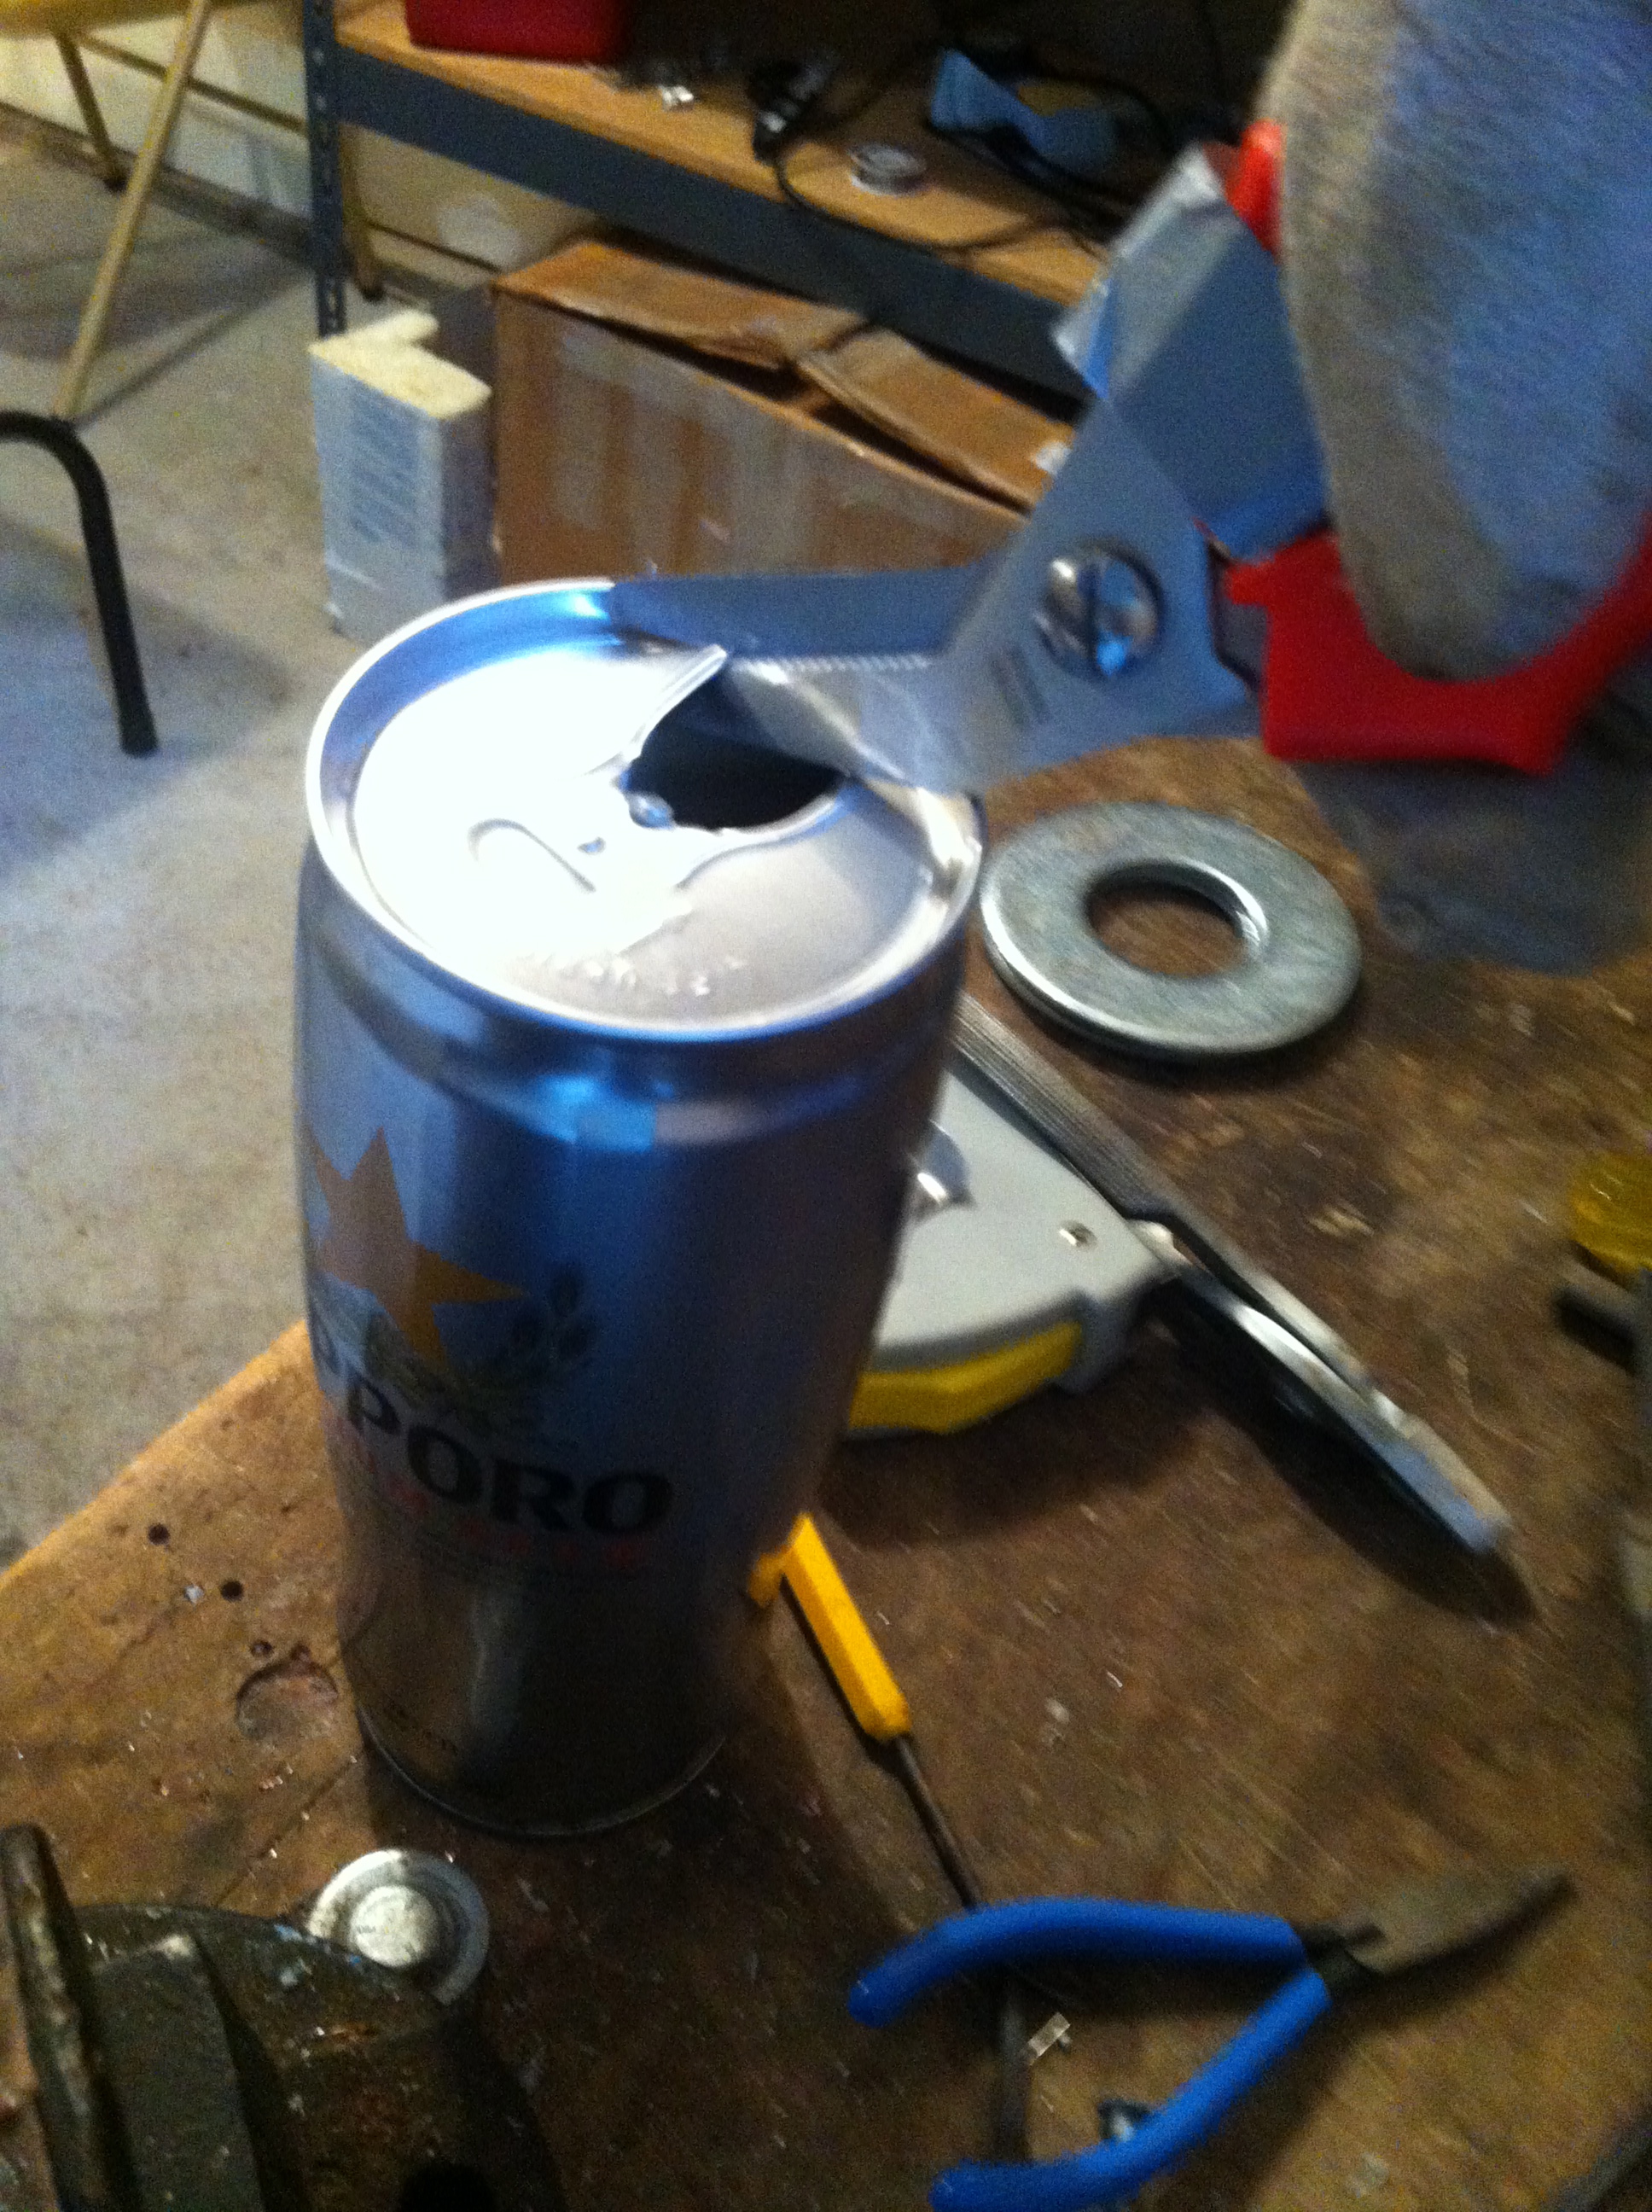
 Next, cut the top off. This is more difficult than you might imagine, I used some small tin snips and needle-nose pliers to remove the top (pic below). It is much more difficult to do this on a steel can vs aluminum and you should wear proper gloves unless you like multiple, deep cuts on your fingers. This will be the viewport.
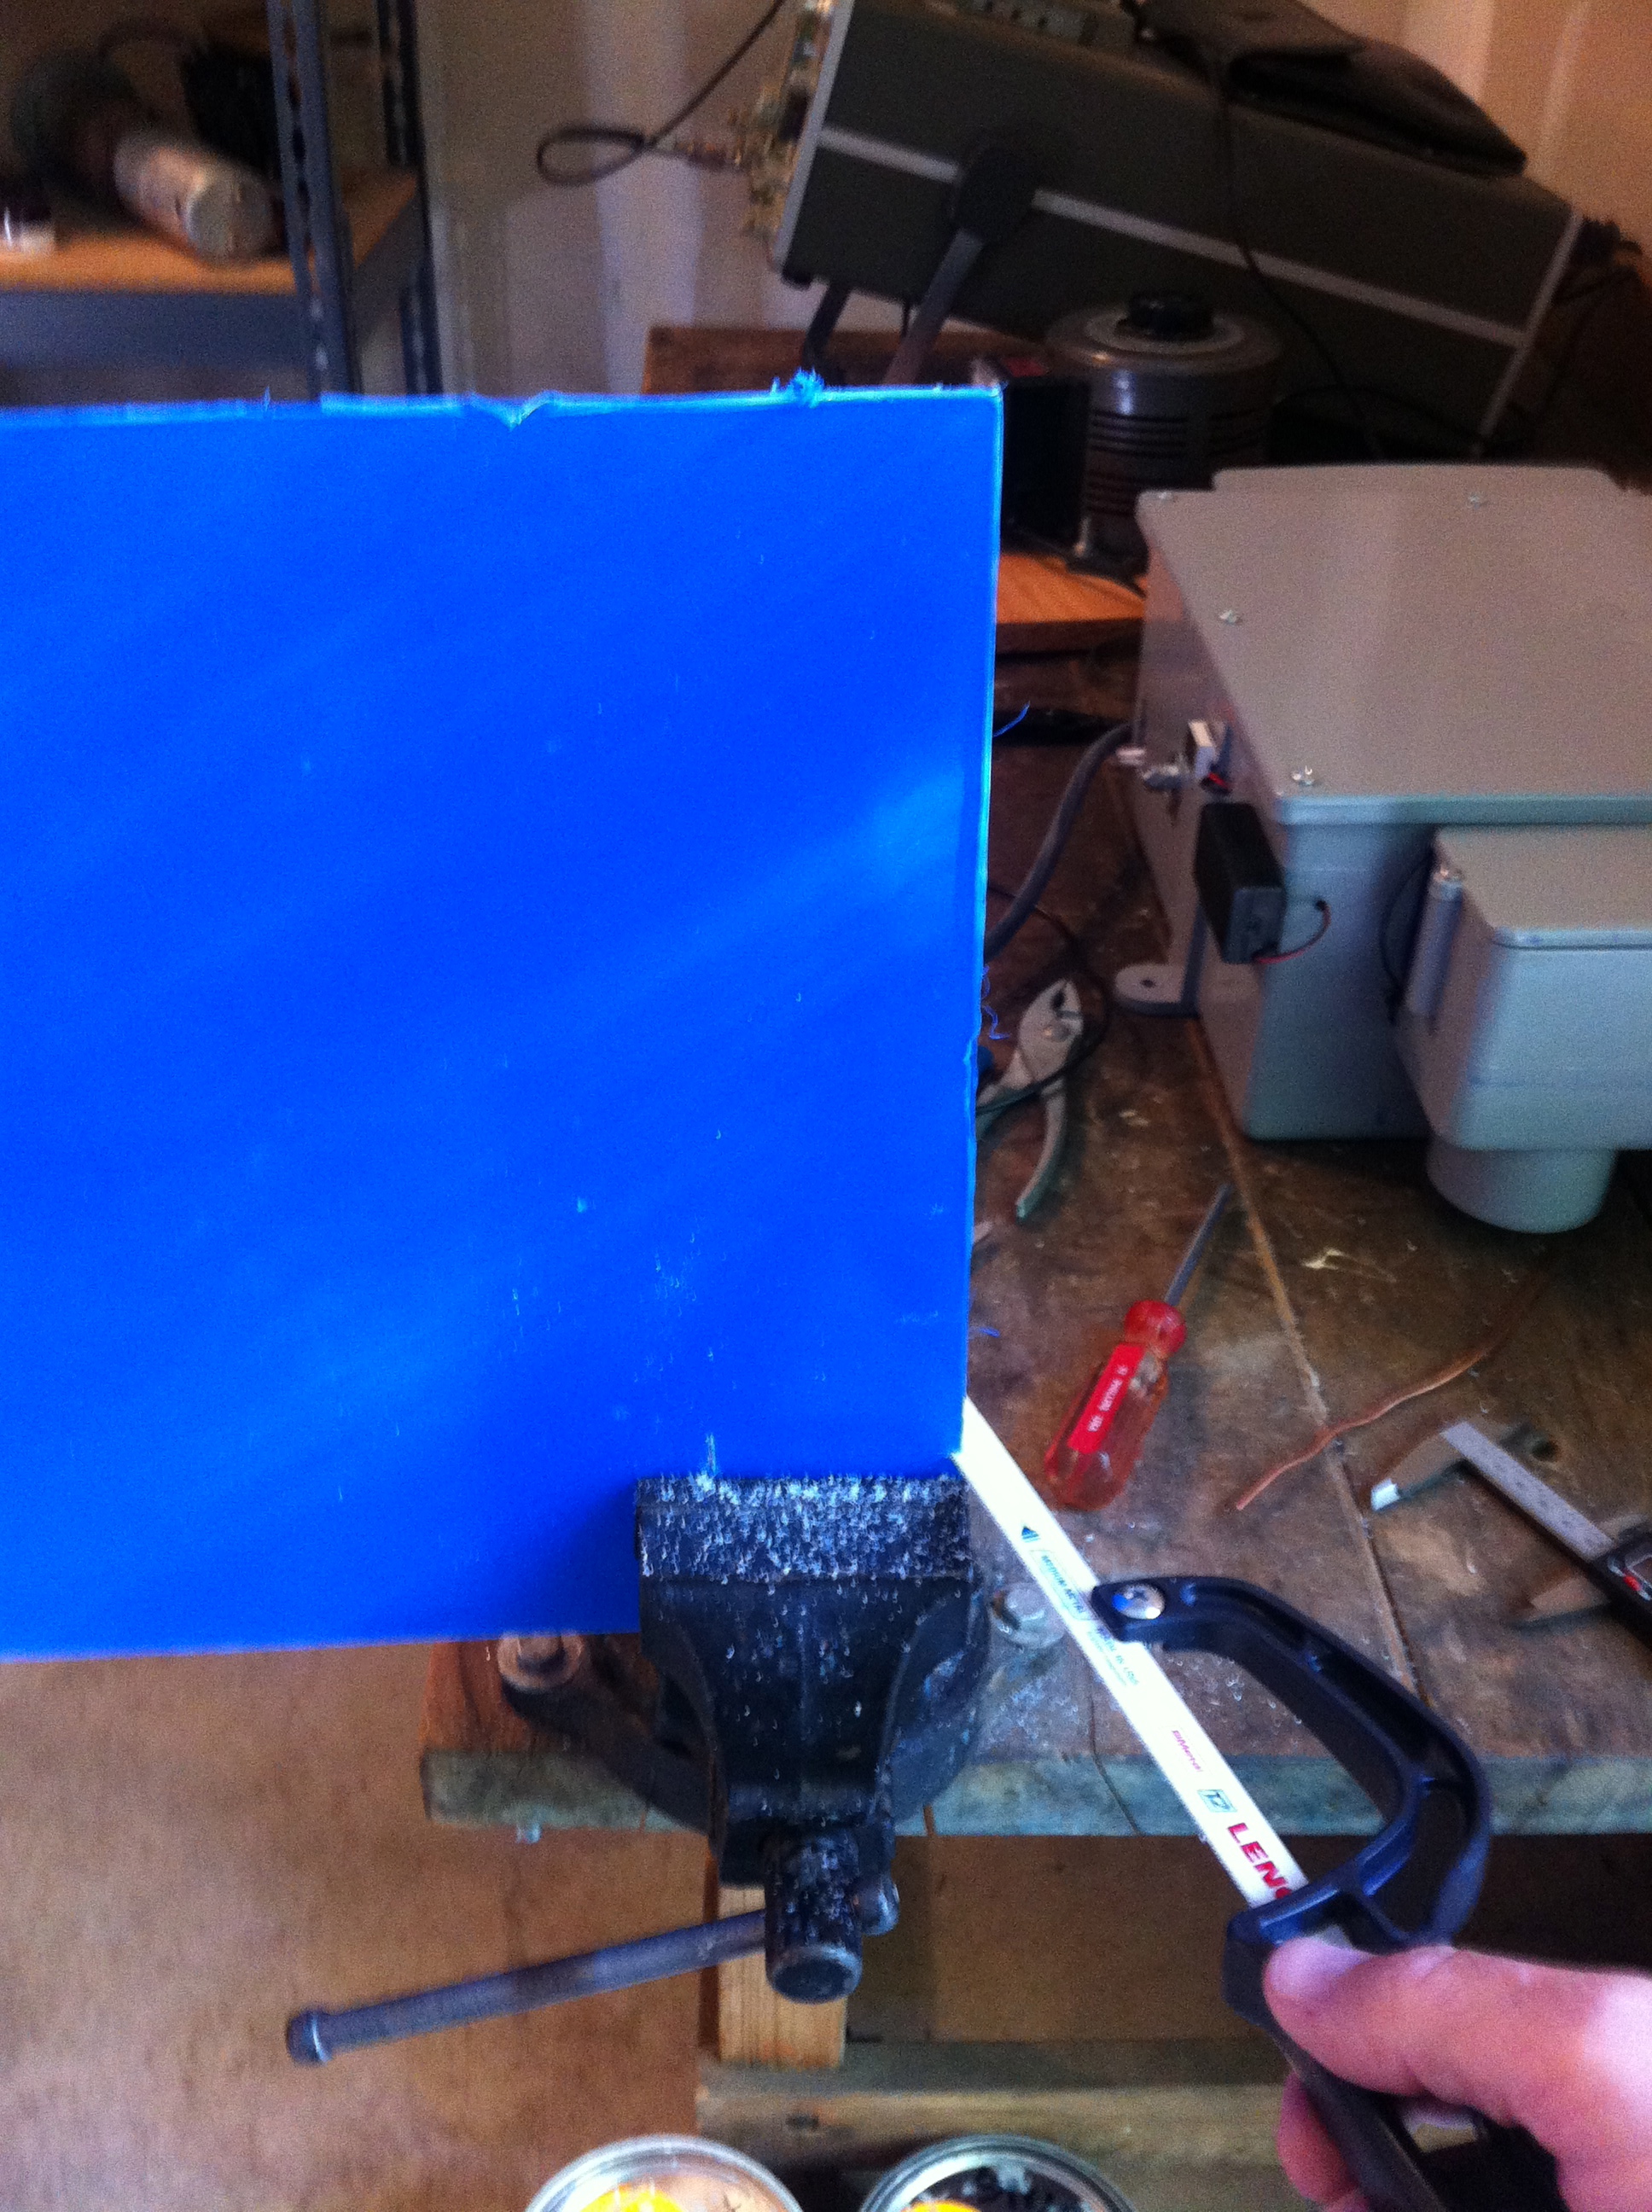
 After you’ve finished drilling and cutting, clean out the can with soap and water and let dry. Next, cut the neoprene in the shape of the zinc washer to be used as a gasket, then cut a small square from the lexan sheet (below).
 Next step is to epoxy the vacuum and spark plug feedthroughs. Epoxy one of the zinc washers on the viewport end. Epoxy the lexan window to the other zinc washer (see below).
During this process, don’t forget to keep the supervisor happy:
 Wait until the epoxy sets, about 24 hours, and then add thread sealant tape to the spark plug and crank it in tight. Clamp together the gasket and window flange to the viewport end.
Now you’re ready to test the vacuum!
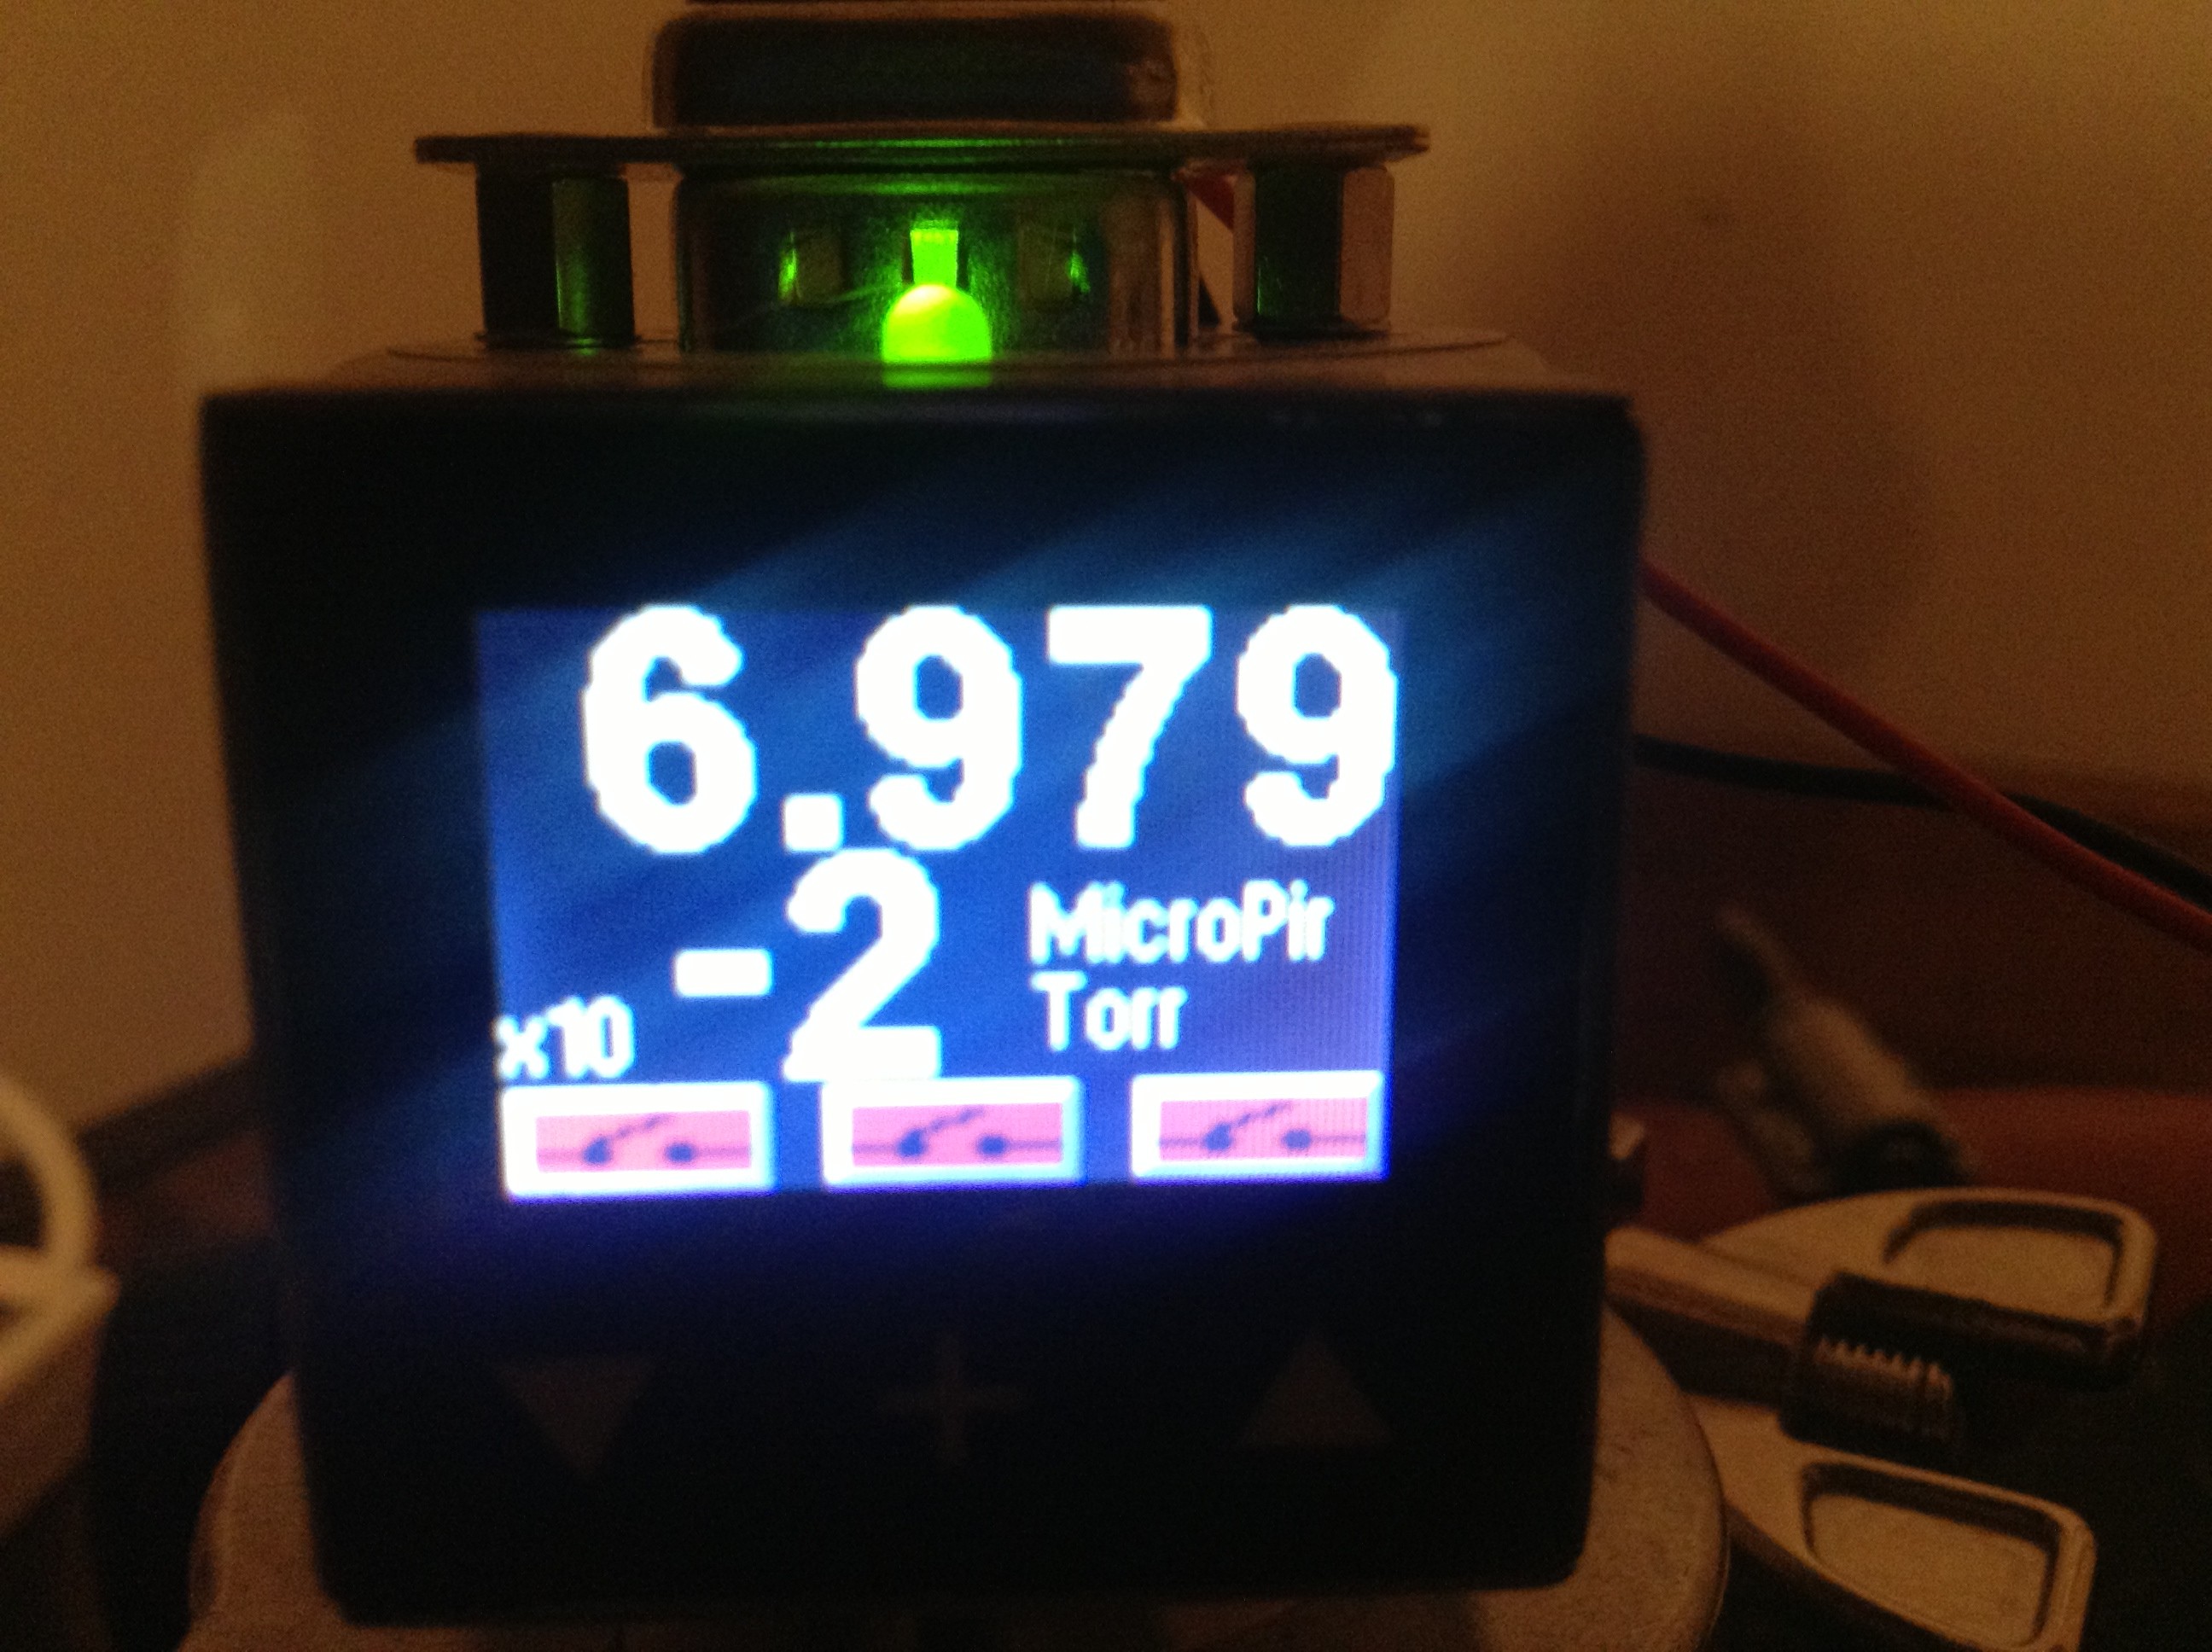
Attach the chamber to a vacuum pump that has an appropriate vacuum gauge (see two pics below):
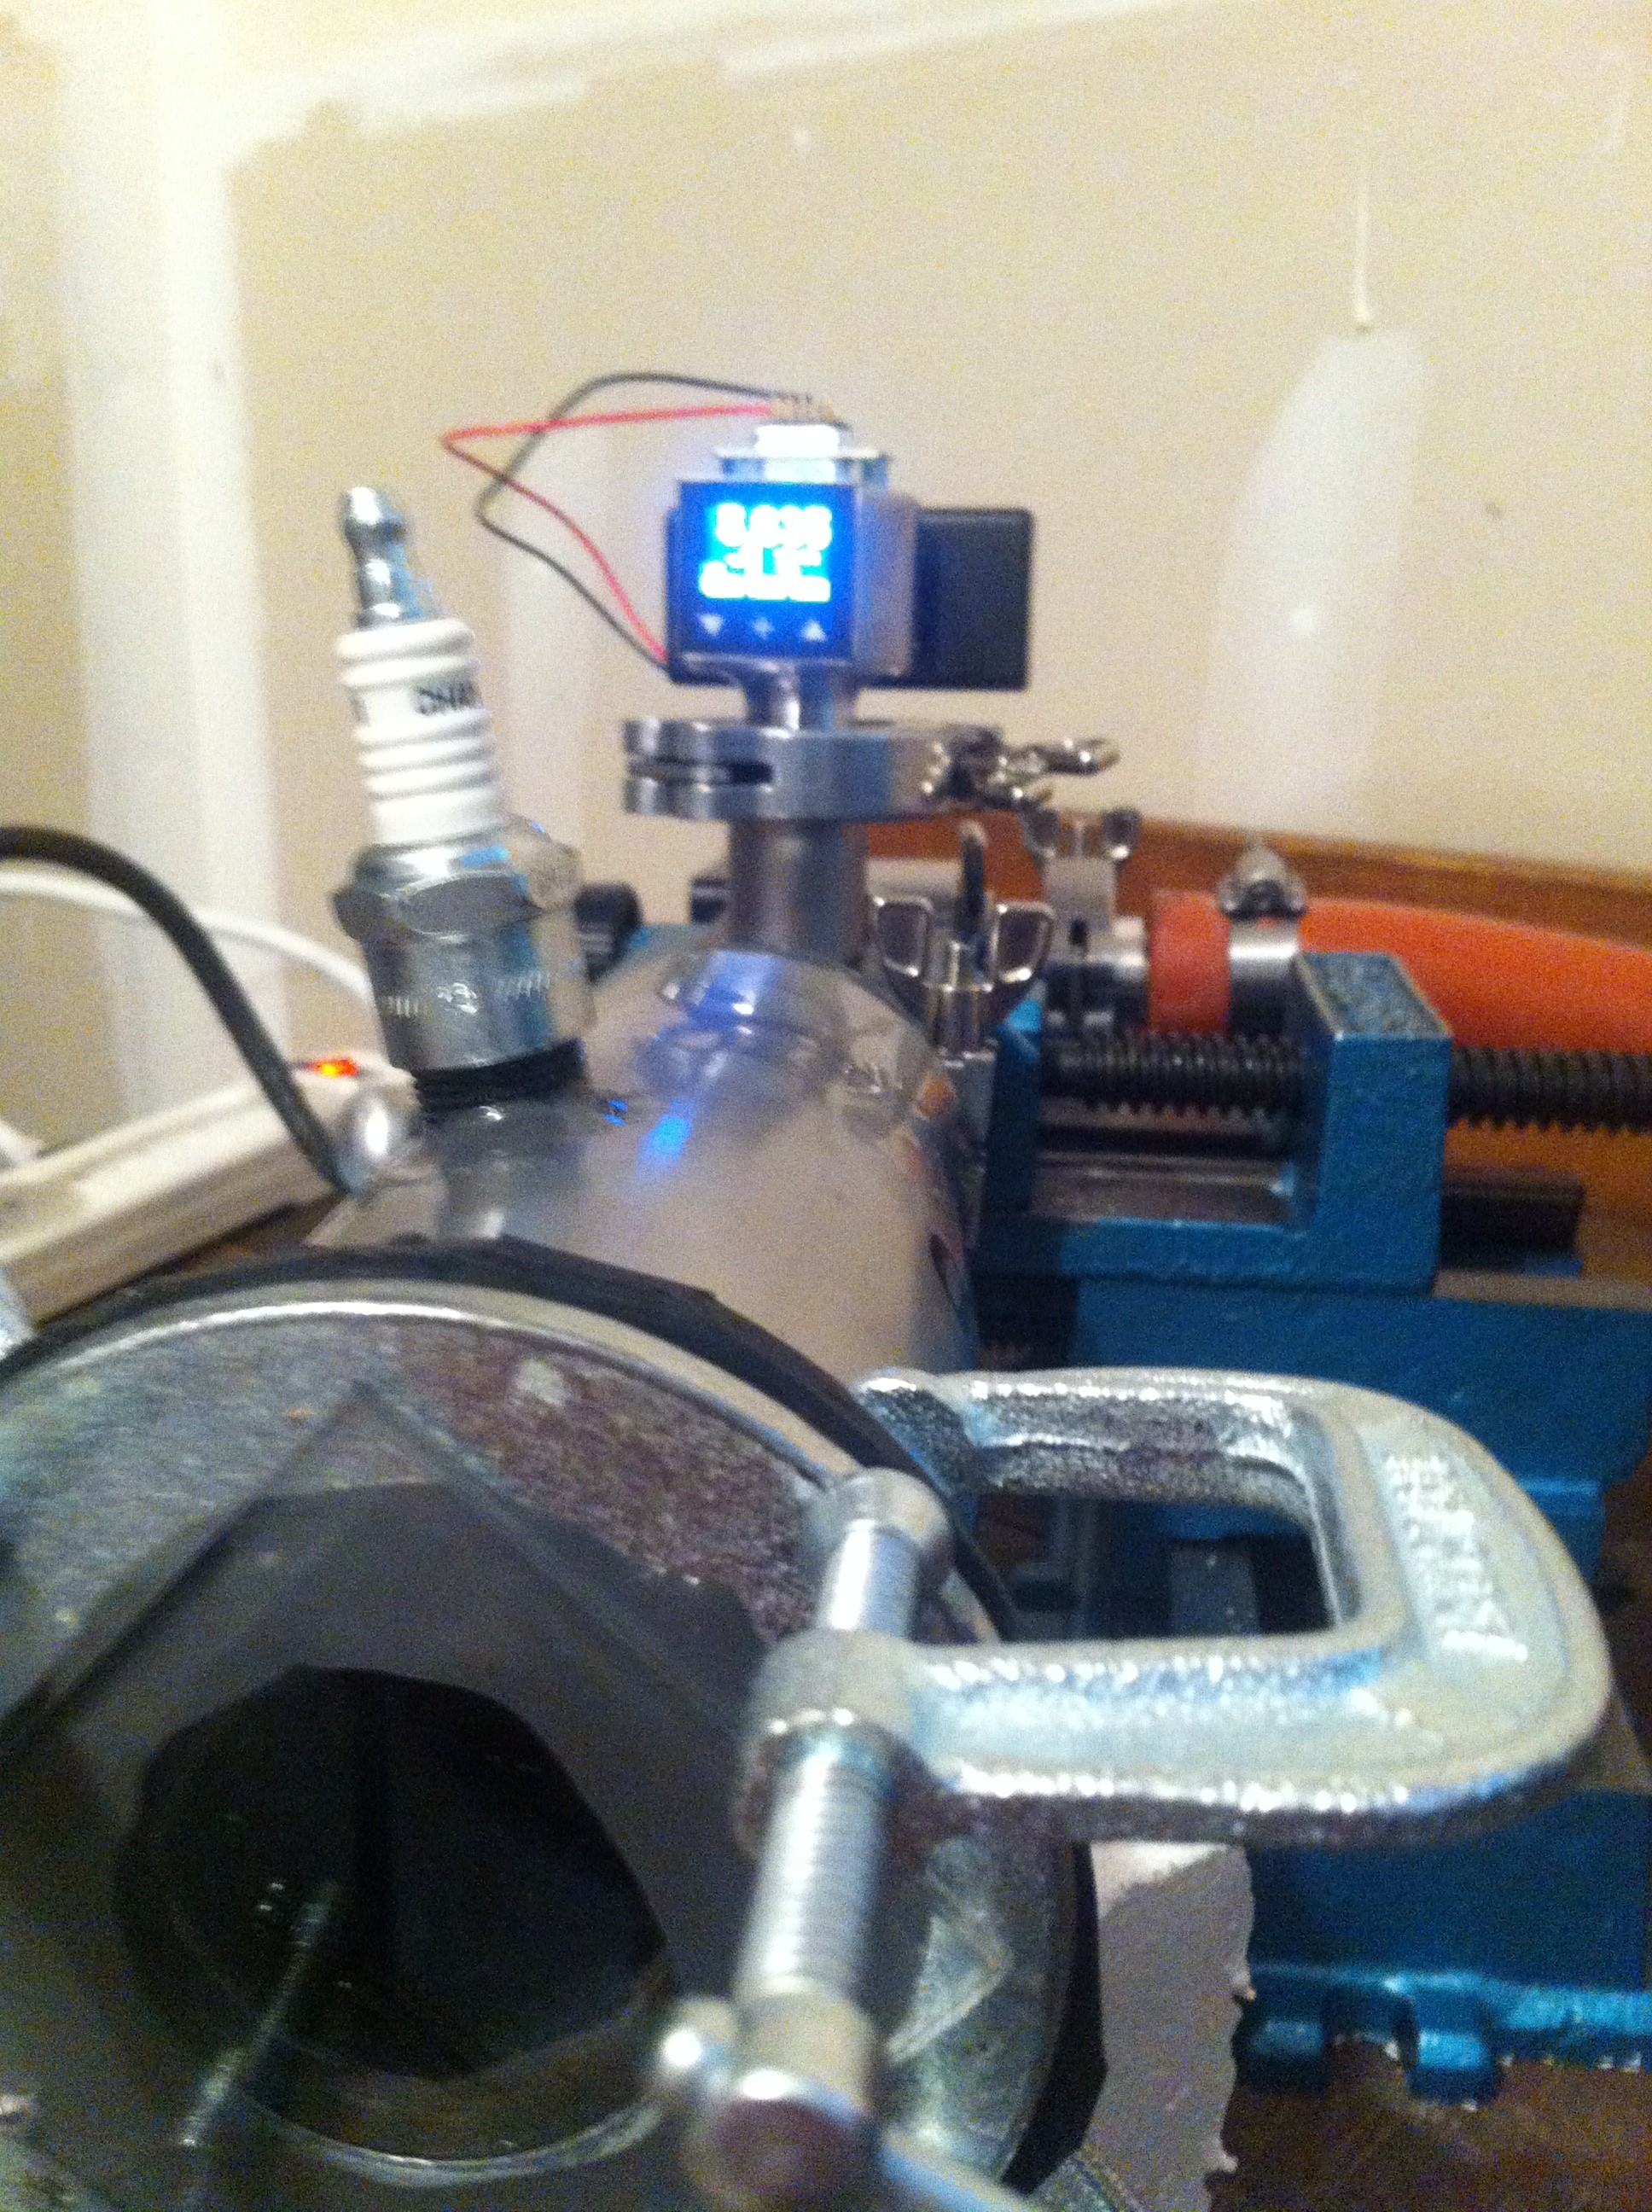
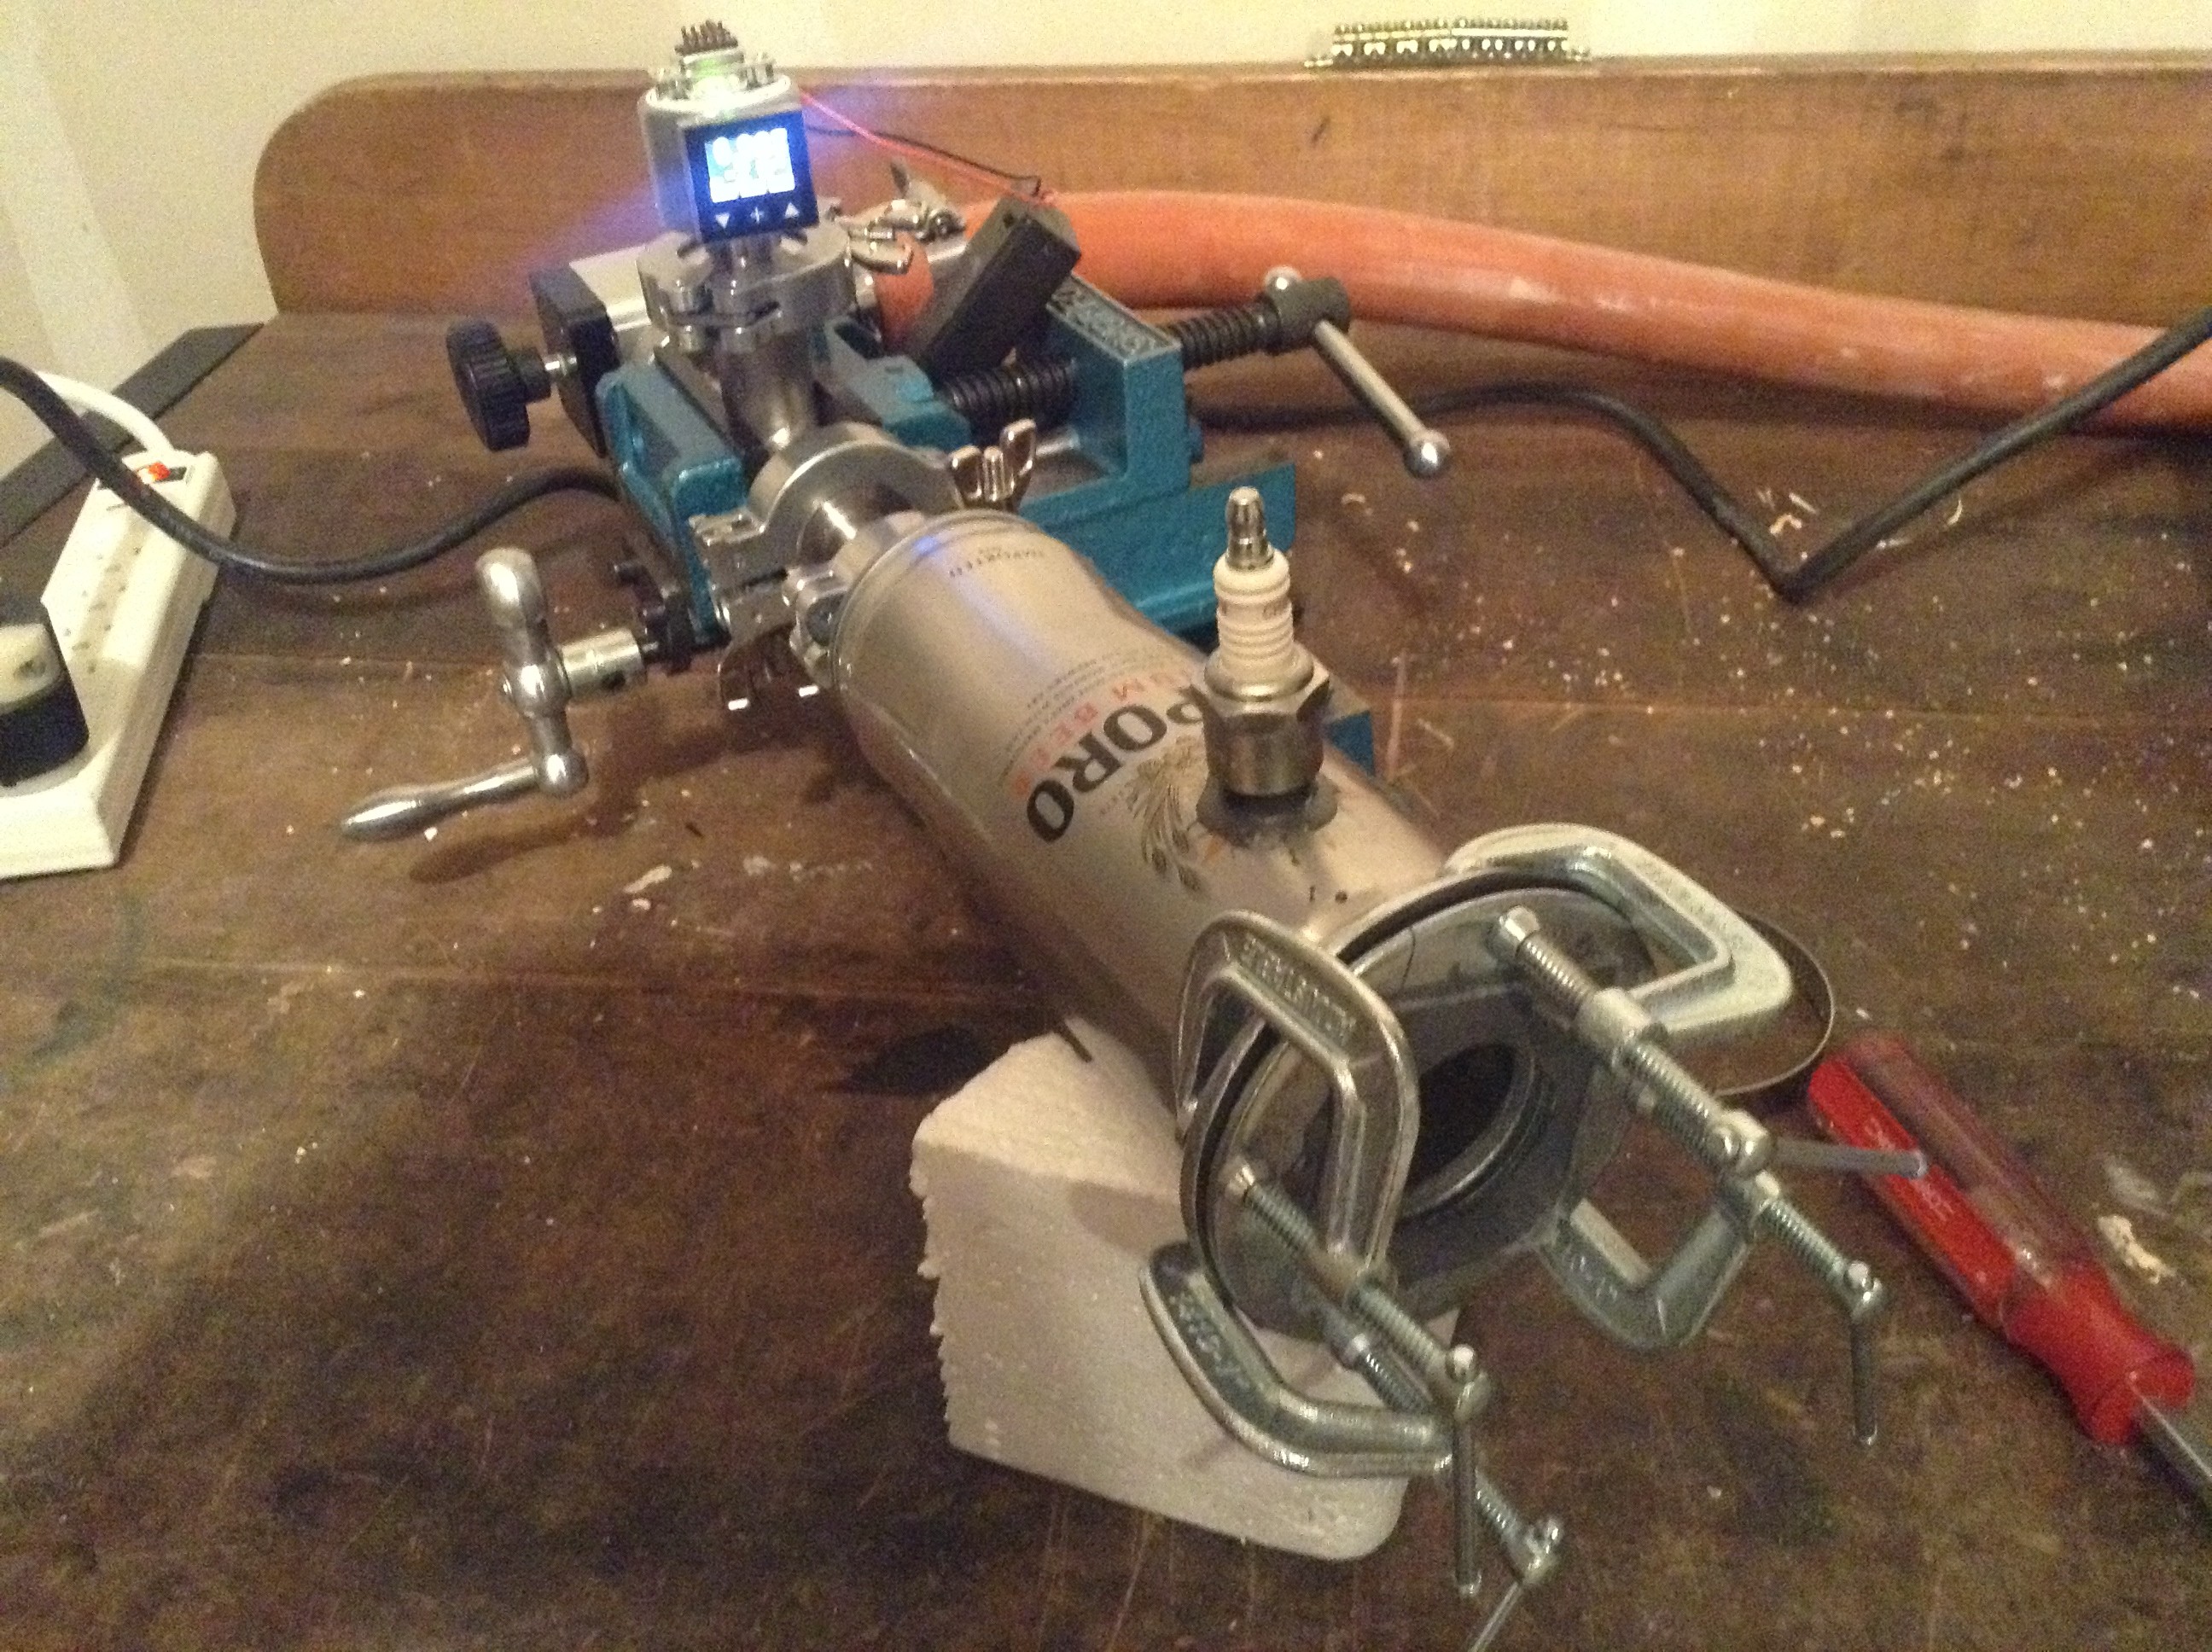 Turn on the pump and wait. After several minutes, my chamber read below 70 millitorr (last pic below). That’s good enough for the first step, a “demo” reactor that will generate an air plasma. Cool!
Next: Hooking up the power !!
Posted in Nuclear Fusion Reactor, Uncategorized by Mark with comments disabled.